John Deere Service Advisor Installation + Video
- Download this document, you need 0 Gallons
John Deere Service Advisor Installation + Video
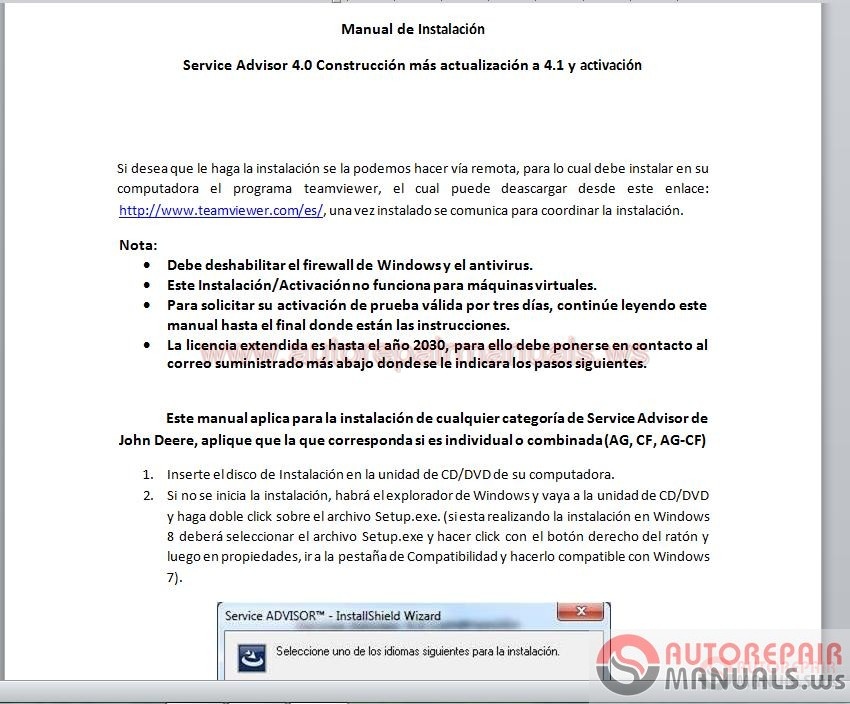
Service Advisor Installation Manual
Service Advisor 4.0 Build plus update to 4.1 and activation
If you want to do the installation we can do it remotely, for which you must install on your computer the program teamviewer, which can be downloaded from this link:
Http://www.teamviewer.com/en/, once installed it communicates to coordinate the installation.
Note:
• You must disable the Windows firewall and antivirus.
• This Installation / Activation does not work for virtual machines.
• To request your valid test activation for three days, continue reading this manual to the end where the instructions are.
• The extended license is until the year 2030, so you must contact the email provided below where you will be indicated the next steps.
This manual applies to the installation of any Service Advisor
John Deere, apply that which corresponds if it is individual or combined (AG, CF, AG-CF)
1. Insert the Installation disc into the CD / DVD drive of your computer.
2. If the installation does not start, there will be the Windows Explorer and go to the CD / DVD drive
And double click on the file Setup.exe. (If you are installing to Windows
8, you must select the Setup.exe file and right-click and then on properties, go to the Compatibility tab and make it compatible with Windows
7).
3. Click OK in the previous window.
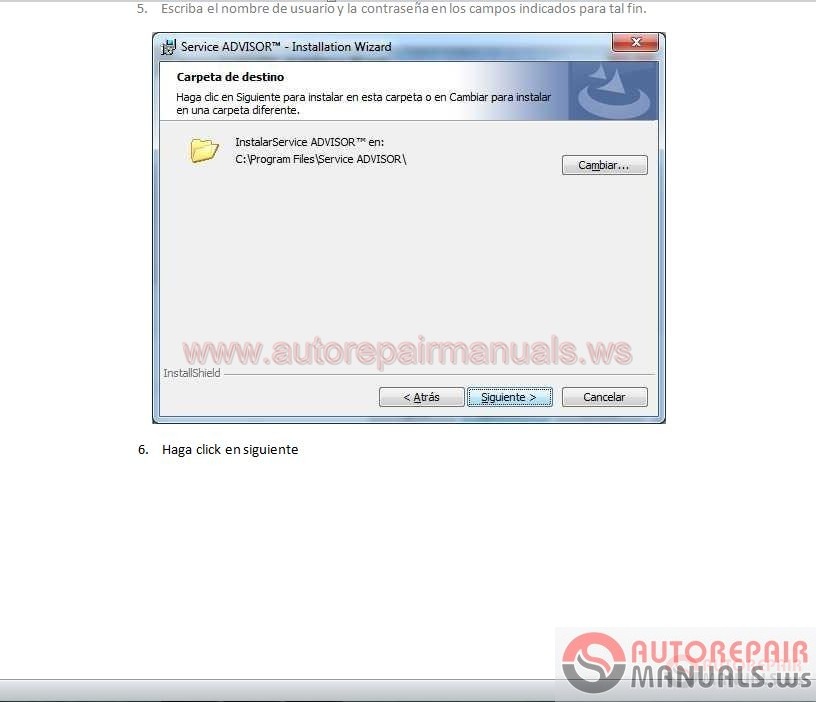
4. Click Next.
5. Enter the username and password in the fields indicated for this purpose.
6. Click Next
7. Click Next
8. Click Install
9. Select the box as shown in the image and click Install.
10. Click on Install this driver software anyway. Repeat this action each time you exit this window.
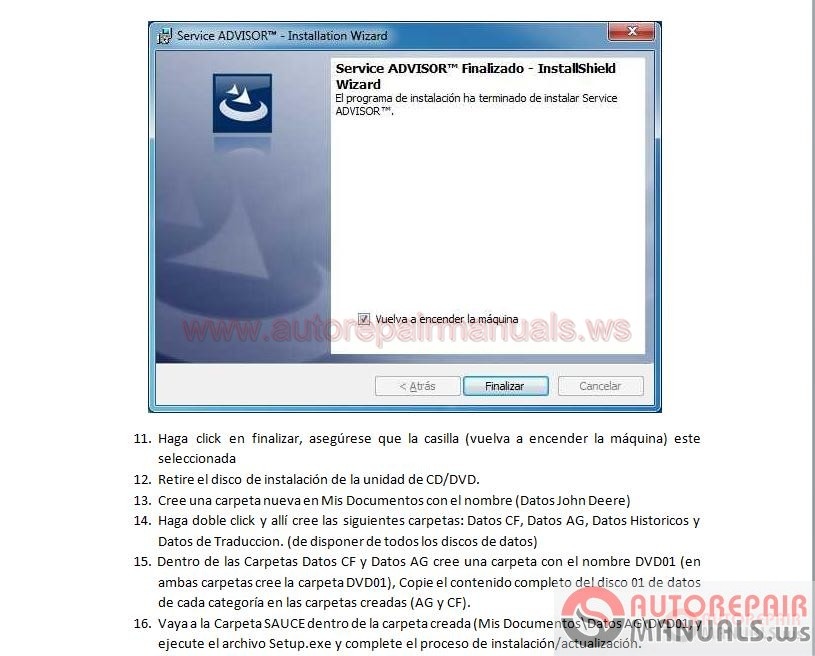
11. Click on Finish, make sure the box (switch on machine) is selected
12. Remove the installation disc from the CD / DVD drive.
13. Create a new folder in My Documents named (John Deere Data)
14. Double-click and there you create the following folders: CF Data, AG Data, Historical Data and
Translation Data. (To have all data discs available)
15. Within the Data Files and Data Files folder, create a folder named DVD01 (in both folders create the folder DVD01), Copy the complete contents of the data disk 01 of each category into the created folders (AG and CF).
16. Go to the SAUCE Folder inside the created folder (My Documents \ AG \ DVD01 Data, and run the Setup.exe file and complete the installation / update process.
17. At the end of the installation / upgrade process continue with this procedure.
18. Go to C: \ Program Files \ ECULP and double click on the file
ECULPINIConfig.exe.
19. Select the Security tab, select and copy with the right mouse button the number that appears in the field The HostID for this machine is:
20. Send to mcartier80@gmail.com the number of the field The HostID for this machine is :, to generate your valid test license for three (3) days.
21. You will receive an email from the above email account with a zip file
RAR, which must be downloaded and unzipped on your computer desktop.
22. Go to the folder where I save the decompressed files
23. Double click on the file JDACT.exe, and follow the steps of the windows that will open next.
24. Finally when the window appears where the DONE button is, it is already
Activated the John Deere Service Advisor.
So far we have already installed and validated the license of the Service Advisor 4.1, we will proceed with loading data.
1. Proceed to open the service advisor by double-clicking the icon on the desktop.
2. Click the I accept button in the window that opens from the service advisor.
3. Click on the Change routes button
4. Click the Add Route button
5. Click on browse and locate the folder where I copied the contents of the data disk
01. (apply this point for the two categories CF and AG, in this order)
6. Click on the OK button
7. Go to the folder where the content of data disk 01 of both CF categories is
And AG.
8. Double-click on the SA.ini file and change in the line (Termination = 20 ?? / ?? / ??) the year only and place Termination = 2050 / ??? / ??, Note and remember the date that Appears on the line since you must place it again later.
9. Save the file and close it. (Perform this procedure for both CF and AG categories)
10. Go back to the Service Advisor and click on the Update button
11. Click on Accept
12. Go back to the folder of the contents of data disk 01.
13. Double click on the SA.ini file and change in the line (Termination = 2050 / ?? / ??) the year only and place Termination = 20 ?? / ?? / ??, place the date that had previously .
14. Save the file and close it. (Apply this procedure for both CF and
AG)
15. Go back to the Service Advisor and click the Load Data button.
16. Once the data load is complete, the model selection window will appear, close it and close it.
17. A window will open asking you to select a model for incremental updates.
18. Select the required model and settings for how you want to receive updates from
John Deere. (Be sure to select a model of which is available at the moment they are on the 01 discs of each category CD and AG of the discs that I copy to the hard disk.
The service advisor with all its features is already installed.
In order to install data disks on the hard disk and prevent the service advisor from prompting you for the disk each time you look for a model, you must create the disk images and copy them to the hard disk.
Once there you can proceed to mount the images with some program that supports virtual images, in our case we use power iso which we attach in the manual CD.
Subsequently once the virtual images are mounted, you must assign the path in the service advisor per file \ preferences in the Data Routes / Virtual Drives tab.
This procedure must also be done for historical data disks and translation disks.
Remember once the whole procedure is completed, the next step is to place the EDL (interface) so that Windows can recognize and install the EDL drivers, this step is done with the Service Avisor closed.

Service Advisor Installation Manual
Service Advisor 4.0 Build plus update to 4.1 and activation
If you want to do the installation we can do it remotely, for which you must install on your computer the program teamviewer, which can be downloaded from this link:
Http://www.teamviewer.com/en/, once installed it communicates to coordinate the installation.
Note:
• You must disable the Windows firewall and antivirus.
• This Installation / Activation does not work for virtual machines.
• To request your valid test activation for three days, continue reading this manual to the end where the instructions are.
• The extended license is until the year 2030, so you must contact the email provided below where you will be indicated the next steps.
This manual applies to the installation of any Service Advisor
John Deere, apply that which corresponds if it is individual or combined (AG, CF, AG-CF)
1. Insert the Installation disc into the CD / DVD drive of your computer.
2. If the installation does not start, there will be the Windows Explorer and go to the CD / DVD drive
And double click on the file Setup.exe. (If you are installing to Windows
8, you must select the Setup.exe file and right-click and then on properties, go to the Compatibility tab and make it compatible with Windows
7).
3. Click OK in the previous window.
4. Click Next.
5. Enter the username and password in the fields indicated for this purpose.
6. Click Next
7. Click Next
8. Click Install
9. Select the box as shown in the image and click Install.
10. Click on Install this driver software anyway. Repeat this action each time you exit this window.
11. Click on Finish, make sure the box (switch on machine) is selected
12. Remove the installation disc from the CD / DVD drive.
13. Create a new folder in My Documents named (John Deere Data)
14. Double-click and there you create the following folders: CF Data, AG Data, Historical Data and
Translation Data. (To have all data discs available)
15. Within the Data Files and Data Files folder, create a folder named DVD01 (in both folders create the folder DVD01), Copy the complete contents of the data disk 01 of each category into the created folders (AG and CF).
16. Go to the SAUCE Folder inside the created folder (My Documents \ AG \ DVD01 Data, and run the Setup.exe file and complete the installation / update process.
17. At the end of the installation / upgrade process continue with this procedure.
18. Go to C: \ Program Files \ ECULP and double click on the file
ECULPINIConfig.exe.
19. Select the Security tab, select and copy with the right mouse button the number that appears in the field The HostID for this machine is:
20. Send to mcartier80@gmail.com the number of the field The HostID for this machine is :, to generate your valid test license for three (3) days.
21. You will receive an email from the above email account with a zip file
RAR, which must be downloaded and unzipped on your computer desktop.
22. Go to the folder where I save the decompressed files
23. Double click on the file JDACT.exe, and follow the steps of the windows that will open next.
24. Finally when the window appears where the DONE button is, it is already
Activated the John Deere Service Advisor.
So far we have already installed and validated the license of the Service Advisor 4.1, we will proceed with loading data.
1. Proceed to open the service advisor by double-clicking the icon on the desktop.
2. Click the I accept button in the window that opens from the service advisor.
3. Click on the Change routes button
4. Click the Add Route button
5. Click on browse and locate the folder where I copied the contents of the data disk
01. (apply this point for the two categories CF and AG, in this order)
6. Click on the OK button
7. Go to the folder where the content of data disk 01 of both CF categories is
And AG.
8. Double-click on the SA.ini file and change in the line (Termination = 20 ?? / ?? / ??) the year only and place Termination = 2050 / ??? / ??, Note and remember the date that Appears on the line since you must place it again later.
9. Save the file and close it. (Perform this procedure for both CF and AG categories)
10. Go back to the Service Advisor and click on the Update button
11. Click on Accept
12. Go back to the folder of the contents of data disk 01.
13. Double click on the SA.ini file and change in the line (Termination = 2050 / ?? / ??) the year only and place Termination = 20 ?? / ?? / ??, place the date that had previously .
14. Save the file and close it. (Apply this procedure for both CF and
AG)
15. Go back to the Service Advisor and click the Load Data button.
16. Once the data load is complete, the model selection window will appear, close it and close it.
17. A window will open asking you to select a model for incremental updates.
18. Select the required model and settings for how you want to receive updates from
John Deere. (Be sure to select a model of which is available at the moment they are on the 01 discs of each category CD and AG of the discs that I copy to the hard disk.
The service advisor with all its features is already installed.
In order to install data disks on the hard disk and prevent the service advisor from prompting you for the disk each time you look for a model, you must create the disk images and copy them to the hard disk.
Once there you can proceed to mount the images with some program that supports virtual images, in our case we use power iso which we attach in the manual CD.
Subsequently once the virtual images are mounted, you must assign the path in the service advisor per file \ preferences in the Data Routes / Virtual Drives tab.
This procedure must also be done for historical data disks and translation disks.
Remember once the whole procedure is completed, the next step is to place the EDL (interface) so that Windows can recognize and install the EDL drivers, this step is done with the Service Avisor closed.
More the random threads same category:
- JohnDree Service Advisor 4.1.X New Activator
- John Deere Service Advisor 4.2.0 CF Multilanguage + KG
- John Deere Service Advisor V4.2.005 AG [02.2016] Win 7, 8, 10
- John Deere PLD File Encryptor/Decryptor (Editor)
- John Deere 4.2 Activator v2015.10
- John Deere Service Advisor 5.2 AG + CF
- John Deere Service Advisor CF 08.2015
- John Deere Service ADVISOR 5.2.370.0
- John Deere Service Advisor 5.2 CF and AG [2018.05] Full
- John Deere Service Advisor C&F 08.2014 EN Full + Instruction
- John Deere CF 4.2.006 (Construction & Foresty) [05.2016]
- John Deere Service ADVISOR AG ES (AGRICULTURA) [02.0216] Full
- John Deere CF 4.2 (Construction & Foresty) [02.2016] Full
- John Deere Parts Manager PRO 6.5.5 AG [03.2015] Full Actived + Instruction
- John Deere Service Advisor 5.2 Agriculture AG EN 2019.11