

- Gallons
- 230,792
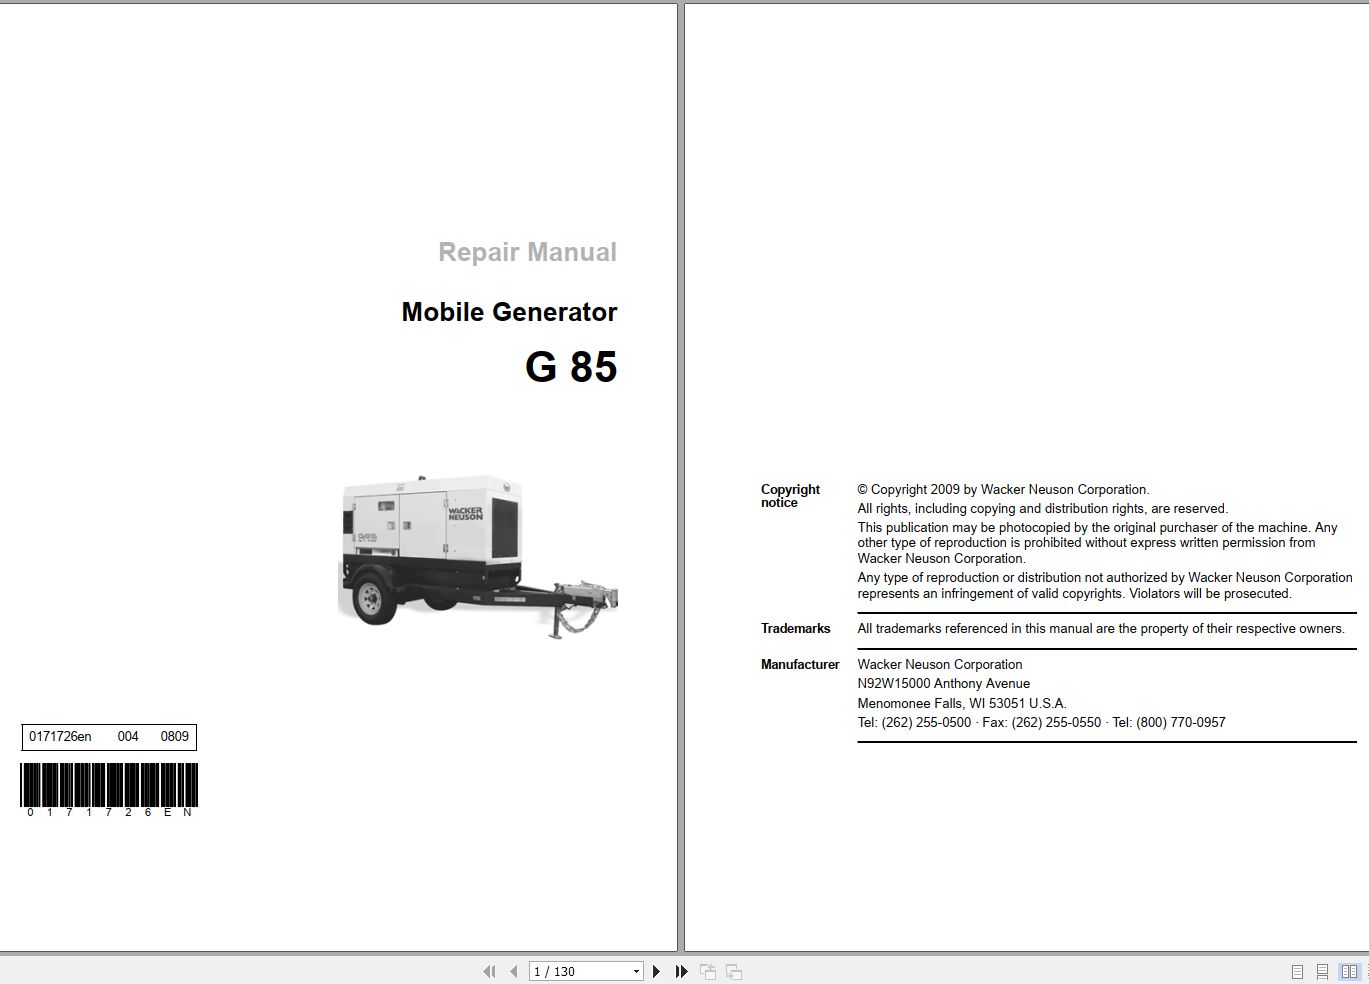
Wacker Neuson Mobile Generator G 85 Repair Manual 330564592
- Download this document, you need 1050 Gallons
Wacker Neuson Mobile Generator G 85 Repair Manual 330564592
Size: 12.27 MB
Format: PDF
Language: English
Brand: Wacker Neuson
Type of Machine: Mobile Generator
Type of Manual: Repair Manual
Model: Wacker Neuson G 85, Mobile Generator
Part Number: 330564592
Publication Date: 2009
Number of Pages: 130 Pages
Contents:
Mobile Generator
1 Safety Information
1.1 Operating Safety
1.2 Service Safety
1.3 Operator Safety while using Internal Combustion Engines
1.4 Towing Safety
1.5 Reporting Trailer Safety Defects
2 Theory of Operation
2.1 Basic Schematic
2.2 Introduction
2.3 Terminology
3 Electrical Testing Techniques
3.1 Checking Continuity
3.2 Checking Resistance
3.3 Checking Voltage
3.4 Probing ECM Plugs and Pins
4 ECM Background Information
4.1 ECM Handling Precaution
4.2 Normal Boot-up Sequence
4.3 Display Variables and Values
4.4 ECM Display Screens-Start Switch in Remote Position
4.5 Additional Variables Monitored by the ECM
4.6 Voltage Display Errors
4.7 ECM Automatic Engine Shutdown Conditions
4.8 ECM Circuit Boards
4.9 Control Wiring Numbering & Colors
4.10 Removing and Installing the ECM
5 ECM/Sensor Troubleshooting
6 John Deere Engines With ECU
6.1 John Deere Engines With ECU Background
6.2 Locations of Engine Electrical Components
6.3 Engine Electrical Components
7 Engine Starting Troubleshooting
8 Output Voltage Troubleshooting
9 Disassembly/Assembly Procedures
9.1 Tools
9.2 Ordering Parts
9.3 Reference Numbers ( )
9.4 Weight Block
9.5 Removing the Roof
9.6 Preparing Unit for Generator Removal
9.7 Replacing the Generator
9.8 Removing the AVR
9.9 Installing the AVR
9.10 Removing the Engine
9.11 Installing the Engine
9.12 Replacing the Fuel Tank
9.13 Replacing the Emergency Stop Switch (older)
9.14 Replacing the Emergency Stop Switch (newer)
9.15 Replacing the Diodes
9.16 Replacing the Voltage Selector Switch (VSS)
9.17 G 50, G 70, G 85 VSS Wiring
10 Technical Data
10.1 Engine Data
10.2 Generator Data
10.3 Trailer and Skid Data
10.4 Dimensions
10.5 Engine Wiring Diagram-John Deere with ECU
10.6 ECU Wiring Diagram
10.7 ECU Harness Connector
10.8 Generator Wiring Diagram
1 Safety Information
1.1 Operating Safety
1.2 Service Safety
1.3 Operator Safety while using Internal Combustion Engines
1.4 Towing Safety
1.5 Reporting Trailer Safety Defects
2 Theory of Operation
2.1 Basic Schematic
2.2 Introduction
2.3 Terminology
3 Electrical Testing Techniques
3.1 Checking Continuity
3.2 Checking Resistance
3.3 Checking Voltage
3.4 Probing ECM Plugs and Pins
4 ECM Background Information
4.1 ECM Handling Precaution
4.2 Normal Boot-up Sequence
4.3 Display Variables and Values
4.4 ECM Display Screens-Start Switch in Remote Position
4.5 Additional Variables Monitored by the ECM
4.6 Voltage Display Errors
4.7 ECM Automatic Engine Shutdown Conditions
4.8 ECM Circuit Boards
4.9 Control Wiring Numbering & Colors
4.10 Removing and Installing the ECM
5 ECM/Sensor Troubleshooting
Continue
Replace the fuse with one of the same size and rating.
Continue
Check the function of the main circuit breaker. The shunt of the main circuit breaker is most likely the cause of a fuse failure. See section 5.10 Checking the Main Circuit Breaker.
The fuses are OK.
Replace the fuse with one of the same size and rating.
Continued from the previous page.
Continued from the previous page.
6 John Deere Engines With ECU
6.1 John Deere Engines With ECU Background
6.2 Locations of Engine Electrical Components
6.3 Engine Electrical Components
7 Engine Starting Troubleshooting
Continue
Replace the fuse with one of the same size and rating.
Continue
Check the function of the main circuit breaker. The shunt of the main circuit breaker is most likely the cause of a fuse failure. See Section 7.7 Checking the Main Circuit Breaker.
The fuses are OK.
Replace the fuse with one of the same size and rating.
Go to step 6.
Continue
Continue
Charge the battery.
Continue
Repair or replace wire #53.
Continue
Repair or replace wire #15.
The ECM is OK.
The ECM has failed. Call Wacker Neuson Service.
Continue
The emergency stop switch has failed; replace it.
The emergency stop switch is not the problem.
The emergency stop switch has failed; replace it.
Continue
Repair or replace the red wire.
Continue
Repair or replace wire #422.
Continue
Repair or replace wire #050D or wire #14.
The starter relay is OK.
The starter relay has failed; replace it.
Continue
Repair or replace the large red wire.
Continue
Repair or replace small red wire.
Continue
Repair or replace red wire #11.
Continue
Repair or replace grey wire #65.
Continue
Repair or replace wire #14.
The intake heater relay is OK.
The intake heater relay has failed; replace it.
Continue
The main circuit breaker has failed; replace it.
Continue
The main circuit breaker has failed; replace it.
Continue.
The main circuit breaker has failed; replace it.
The main circuit breaker has failed; replace it.
_____; _____; _____
The main circuit breaker has failed; replace it.
The main circuit breaker is functioning properly.
8 Output Voltage Troubleshooting
The emergency stop switch has failed; replace it.
Continue
The emergency stop switch is OK.
The emergency stop switch has failed; replace it.
Continue
The lug door switch has failed; replace it.
The lug door switch has failed; replace it.
Reconnect the blue and blue/white wires; then continue.
Continue
The lug door switch has failed; replace it.
The lug door switch has failed; replace it.
The lug door switch is OK.
Continue
The main circuit breaker has failed; replace it.
Continue
The main circuit breaker has failed; replace it.
Continue
The main circuit breaker has failed; replace it.
The main circuit breaker has failed; replace it.
_____; _____; _____
The main circuit breaker has failed; replace it.
The main circuit breaker is functioning properly.
Continue
The voltage adjusting rheostat has failed; replace it.
The voltage adjusting rheostat is OK.
The voltage adjusting rheostat has failed; replace it.
Continue
Remove the vent cover from the generator and check the generator for damage.
Auxiliary winding is OK.
Remove the vent cover from the generator and check the generator for damage.
Continue
Remove the vent cover from the generator and check the generator for damage.
Continue
Remove the vent cover from the generator and check the generator for damage; then continue.
The excitor stator is OK.
The exciter stator has failed.
Call Wacker Neuson Service.
Continue
Remove the vent cover from the generator and check the generator for damage.
Continue
Remove the vent cover from the generator and check the generator for damage.
The sensing wires are OK.
Remove the vent cover from the generator and check the generator for damage.
The excitation system is functioning properly.
Check the exciter rotor winding. See Checking the Exciter Rotor Winding.
The main stator windings and the voltage selector switch are OK.
Replace all diodes.
Call Wacker Neuson Service.
Replace all diodes.
Call Wacker Neuson Service.
The main rotor winding has failed.
The main rotor winding is OK.
The main rotor winding has failed. Call Wacker Neuson Service.
The exciter rotor windings are OK.
The exciter rotor has failed. Call Wacker Neuson
_____; _____; _____
The main rotor winding is OK.
The main rotor winding has failed. Call Wacker Neuson Service.
The main stator windings are OK. If there is a difference between the readings taken here and those taken at the lugs, the VSS has failed; replace it.
The main stator windings have failed. Call Wacker Neuson
9 Disassembly/Assembly
9.1 Tools
9.2 Ordering Parts
9.3 Reference Numbers ( )
9.4 Weight Block
9.5 Removing the Roof
9.6 Preparing Unit for Generator Removal
9.7 Replacing the Generator
9.8 Removing the AVR
9.9 Installing the AVR
Continued from the previous page.
Continued from the previous page.
Continued from the previous page.
9.10 Removing the Engine
9.11 Installing the Engine
9.12 Replacing the Fuel Tank
9.13 Replacing the Emergency Stop Switch (older)
9.14 Replacing the Emergency Stop Switch (newer)
9.15 Replacing the Diodes
Continued from the previous page.
9.16 Replacing the Voltage Selector Switch (VSS)
9.17 G 50, G 70, G 85 VSS Wiring
10 Technical Data
10.1 Engine Data
10.2 Generator Data
10.3 Trailer and Skid Data
10.4 Dimensions
10.5 Engine Wiring Diagram-John Deere with ECU
10.6 ECU Wiring Diagram
10.7 ECU Harness Connector
10.8 Generator Wiring Diagram
Sealants.pdf
Threadlockers and Sealants
Torque.pdf
Torque Values
Metric Fasteners (DIN)
Inch Fasteners (SAE)

Size: 12.27 MB
Format: PDF
Language: English
Brand: Wacker Neuson
Type of Machine: Mobile Generator
Type of Manual: Repair Manual
Model: Wacker Neuson G 85, Mobile Generator
Part Number: 330564592
Publication Date: 2009
Number of Pages: 130 Pages
Contents:
Mobile Generator
1 Safety Information
1.1 Operating Safety
1.2 Service Safety
1.3 Operator Safety while using Internal Combustion Engines
1.4 Towing Safety
1.5 Reporting Trailer Safety Defects
2 Theory of Operation
2.1 Basic Schematic
2.2 Introduction
2.3 Terminology
3 Electrical Testing Techniques
3.1 Checking Continuity
3.2 Checking Resistance
3.3 Checking Voltage
3.4 Probing ECM Plugs and Pins
4 ECM Background Information
4.1 ECM Handling Precaution
4.2 Normal Boot-up Sequence
4.3 Display Variables and Values
4.4 ECM Display Screens-Start Switch in Remote Position
4.5 Additional Variables Monitored by the ECM
4.6 Voltage Display Errors
4.7 ECM Automatic Engine Shutdown Conditions
4.8 ECM Circuit Boards
4.9 Control Wiring Numbering & Colors
4.10 Removing and Installing the ECM
5 ECM/Sensor Troubleshooting
6 John Deere Engines With ECU
6.1 John Deere Engines With ECU Background
6.2 Locations of Engine Electrical Components
6.3 Engine Electrical Components
7 Engine Starting Troubleshooting
8 Output Voltage Troubleshooting
9 Disassembly/Assembly Procedures
9.1 Tools
9.2 Ordering Parts
9.3 Reference Numbers ( )
9.4 Weight Block
9.5 Removing the Roof
9.6 Preparing Unit for Generator Removal
9.7 Replacing the Generator
9.8 Removing the AVR
9.9 Installing the AVR
9.10 Removing the Engine
9.11 Installing the Engine
9.12 Replacing the Fuel Tank
9.13 Replacing the Emergency Stop Switch (older)
9.14 Replacing the Emergency Stop Switch (newer)
9.15 Replacing the Diodes
9.16 Replacing the Voltage Selector Switch (VSS)
9.17 G 50, G 70, G 85 VSS Wiring
10 Technical Data
10.1 Engine Data
10.2 Generator Data
10.3 Trailer and Skid Data
10.4 Dimensions
10.5 Engine Wiring Diagram-John Deere with ECU
10.6 ECU Wiring Diagram
10.7 ECU Harness Connector
10.8 Generator Wiring Diagram
1 Safety Information
1.1 Operating Safety
1.2 Service Safety
1.3 Operator Safety while using Internal Combustion Engines
1.4 Towing Safety
1.5 Reporting Trailer Safety Defects
2 Theory of Operation
2.1 Basic Schematic
2.2 Introduction
2.3 Terminology
3 Electrical Testing Techniques
3.1 Checking Continuity
3.2 Checking Resistance
3.3 Checking Voltage
3.4 Probing ECM Plugs and Pins
4 ECM Background Information
4.1 ECM Handling Precaution
4.2 Normal Boot-up Sequence
4.3 Display Variables and Values
4.4 ECM Display Screens-Start Switch in Remote Position
4.5 Additional Variables Monitored by the ECM
4.6 Voltage Display Errors
4.7 ECM Automatic Engine Shutdown Conditions
4.8 ECM Circuit Boards
4.9 Control Wiring Numbering & Colors
4.10 Removing and Installing the ECM
5 ECM/Sensor Troubleshooting
Continue
Replace the fuse with one of the same size and rating.
Continue
Check the function of the main circuit breaker. The shunt of the main circuit breaker is most likely the cause of a fuse failure. See section 5.10 Checking the Main Circuit Breaker.
The fuses are OK.
Replace the fuse with one of the same size and rating.
Continued from the previous page.
Continued from the previous page.
6 John Deere Engines With ECU
6.1 John Deere Engines With ECU Background
6.2 Locations of Engine Electrical Components
6.3 Engine Electrical Components
7 Engine Starting Troubleshooting
Continue
Replace the fuse with one of the same size and rating.
Continue
Check the function of the main circuit breaker. The shunt of the main circuit breaker is most likely the cause of a fuse failure. See Section 7.7 Checking the Main Circuit Breaker.
The fuses are OK.
Replace the fuse with one of the same size and rating.
Go to step 6.
Continue
Continue
Charge the battery.
Continue
Repair or replace wire #53.
Continue
Repair or replace wire #15.
The ECM is OK.
The ECM has failed. Call Wacker Neuson Service.
Continue
The emergency stop switch has failed; replace it.
The emergency stop switch is not the problem.
The emergency stop switch has failed; replace it.
Continue
Repair or replace the red wire.
Continue
Repair or replace wire #422.
Continue
Repair or replace wire #050D or wire #14.
The starter relay is OK.
The starter relay has failed; replace it.
Continue
Repair or replace the large red wire.
Continue
Repair or replace small red wire.
Continue
Repair or replace red wire #11.
Continue
Repair or replace grey wire #65.
Continue
Repair or replace wire #14.
The intake heater relay is OK.
The intake heater relay has failed; replace it.
Continue
The main circuit breaker has failed; replace it.
Continue
The main circuit breaker has failed; replace it.
Continue.
The main circuit breaker has failed; replace it.
The main circuit breaker has failed; replace it.
_____; _____; _____
The main circuit breaker has failed; replace it.
The main circuit breaker is functioning properly.
8 Output Voltage Troubleshooting
The emergency stop switch has failed; replace it.
Continue
The emergency stop switch is OK.
The emergency stop switch has failed; replace it.
Continue
The lug door switch has failed; replace it.
The lug door switch has failed; replace it.
Reconnect the blue and blue/white wires; then continue.
Continue
The lug door switch has failed; replace it.
The lug door switch has failed; replace it.
The lug door switch is OK.
Continue
The main circuit breaker has failed; replace it.
Continue
The main circuit breaker has failed; replace it.
Continue
The main circuit breaker has failed; replace it.
The main circuit breaker has failed; replace it.
_____; _____; _____
The main circuit breaker has failed; replace it.
The main circuit breaker is functioning properly.
Continue
The voltage adjusting rheostat has failed; replace it.
The voltage adjusting rheostat is OK.
The voltage adjusting rheostat has failed; replace it.
Continue
Remove the vent cover from the generator and check the generator for damage.
Auxiliary winding is OK.
Remove the vent cover from the generator and check the generator for damage.
Continue
Remove the vent cover from the generator and check the generator for damage.
Continue
Remove the vent cover from the generator and check the generator for damage; then continue.
The excitor stator is OK.
The exciter stator has failed.
Call Wacker Neuson Service.
Continue
Remove the vent cover from the generator and check the generator for damage.
Continue
Remove the vent cover from the generator and check the generator for damage.
The sensing wires are OK.
Remove the vent cover from the generator and check the generator for damage.
The excitation system is functioning properly.
Check the exciter rotor winding. See Checking the Exciter Rotor Winding.
The main stator windings and the voltage selector switch are OK.
Replace all diodes.
Call Wacker Neuson Service.
Replace all diodes.
Call Wacker Neuson Service.
The main rotor winding has failed.
The main rotor winding is OK.
The main rotor winding has failed. Call Wacker Neuson Service.
The exciter rotor windings are OK.
The exciter rotor has failed. Call Wacker Neuson
_____; _____; _____
The main rotor winding is OK.
The main rotor winding has failed. Call Wacker Neuson Service.
The main stator windings are OK. If there is a difference between the readings taken here and those taken at the lugs, the VSS has failed; replace it.
The main stator windings have failed. Call Wacker Neuson
9 Disassembly/Assembly
9.1 Tools
9.2 Ordering Parts
9.3 Reference Numbers ( )
9.4 Weight Block
9.5 Removing the Roof
9.6 Preparing Unit for Generator Removal
9.7 Replacing the Generator
9.8 Removing the AVR
9.9 Installing the AVR
Continued from the previous page.
Continued from the previous page.
Continued from the previous page.
9.10 Removing the Engine
9.11 Installing the Engine
9.12 Replacing the Fuel Tank
9.13 Replacing the Emergency Stop Switch (older)
9.14 Replacing the Emergency Stop Switch (newer)
9.15 Replacing the Diodes
Continued from the previous page.
9.16 Replacing the Voltage Selector Switch (VSS)
9.17 G 50, G 70, G 85 VSS Wiring
10 Technical Data
10.1 Engine Data
10.2 Generator Data
10.3 Trailer and Skid Data
10.4 Dimensions
10.5 Engine Wiring Diagram-John Deere with ECU
10.6 ECU Wiring Diagram
10.7 ECU Harness Connector
10.8 Generator Wiring Diagram
Sealants.pdf
Threadlockers and Sealants
Torque.pdf
Torque Values
Metric Fasteners (DIN)
Inch Fasteners (SAE)
More the random threads same category:
- Wacker Neuson 803 Spare Parts List
- Wacker Neuson Skid Steer Loader Track ST31 Error Codes, Service, Operator's & Parts Manual EN ES FR
- Wacker Neuson Crawler Excavator 3503 Spare Parts List_1000189534
- Wacker Neuson Compact Excavator 2503 3503 3003 3703 Service Manual_1000081433
- Wacker Neuson Reversible Vibratory Plates DPU 6555 H Operator, Repair Manual & Spare Parts Catalog
- Wacker Neuson Crawler Excavator EZ17 Spare Parts List_1000298089
- Wacker Neuson Skid Steer Loader Track ST35 Error Codes, Service, Operator's & Parts Manual EN DE FR
- Wacker Neuson Wheel Loaders 550 5055 5055L Spare Parts List_1000274206
- Wacker Neuson Track Excavator 6003 Service Manual_1000129840
- Wacker Neuson Track Excavators 75Z3, 8003 Operators Manual_1000132136
- Wacker Neuson Track Excavators 50Z3 Service Manual 1000129833
- Wacker Neuson Wheel Loaders 750, 850 Service Manual_1000183988
- Wacker Neuson Track Excavators 1404 Service Manual_1000166693
- Wacker Neuson Walk-Behind Trowels CT 36-5A Parts Manual_0009438
- Wacker Neuson Kramer Wheel Loader 1150 Spare Parts Manual_100018445